

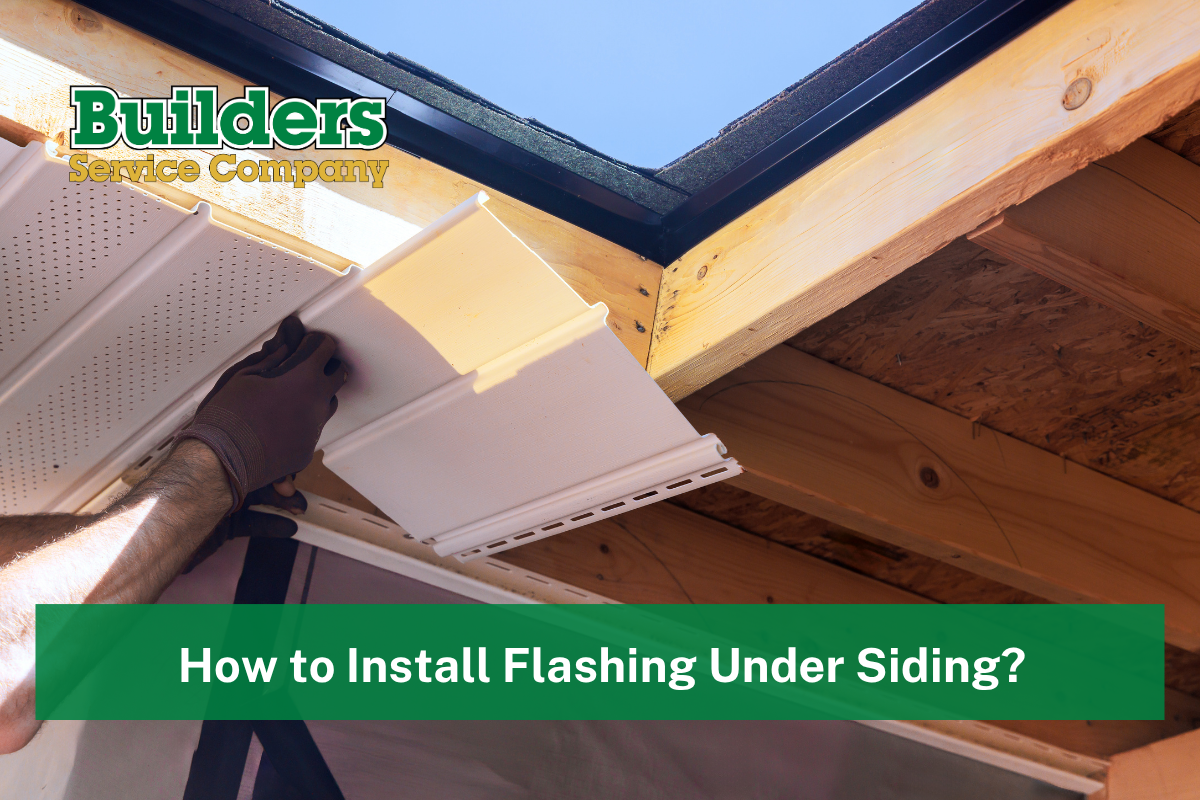
Knowing how to install flashing under siding is less about simply placing metal behind a siding panel and more about controlling where water goes when it gets behind the exterior surface. In Washington’s wet climate, that distinction matters. At Builders Service Company, we have worked on exterior home systems since 1974, and proper moisture management is one of the details that can separate a durable siding installation from one that develops hidden problems years later.
Flashing works with the house wrap, membrane, sheathing, siding, and drainage openings as one connected system. When those layers overlap correctly, water moves down and out rather than toward the wall.
The Most Important Things to Know Before You Start
Before cutting or lifting any siding, keep these points in mind:
- Flashing should direct water outward, not trap it behind the siding.
- The water-resistive barrier must overlap flashing in the correct direction.
- Different areas require different flashing materials and shapes.
- Windows, doors, roof-to-wall intersections, trim, and wall penetrations need extra attention.
- Existing moisture or damaged sheathing should be repaired before new siding is installed.
- Manufacturer instructions and local building requirements should always take priority over a generic installation method.
What Does Flashing Under Siding Actually Do?
Flashing redirects water away from vulnerable joints and openings in the building envelope.
Siding is the first line of defense, but it is not expected to stop every drop of wind-driven rain. The Building America Solution Center explains how a continuous drainage plane behind exterior cladding allows water that passes the siding to drain safely toward the exterior.
That is why siding flashing must be integrated with the barrier behind it. Simply sliding a piece of metal behind a problem area does not automatically create effective water management.
Common locations include:
| Location | Typical Flashing Purpose |
|---|---|
| Above windows and doors | Direct water away from openings |
| Horizontal trim | Prevent water from sitting behind trim |
| Siding butt joints | Protect the barrier behind the joint |
| Roof-to-wall intersections | Move roof runoff away from the wall |
| Bottom of wall | Allow drainage to exit the assembly |
| Pipes and vents | Protect penetrations through the wall |
How to Install Flashing Under Siding Step by Step
The exact installation depends on the siding material and the location being flashed. Still, the basic principle remains consistent: every upper layer should shed water over the layer below it.
1. Inspect the Wall Before Applying Flashing
Do not cover an existing problem.
Carefully inspect the siding, house wrap, membrane, OSB or other sheathing, and surrounding building materials. Look for staining, soft sheathing, mold, damaged barrier material, or evidence that water has been running behind the wall.
For renovation projects, guidance for flashing wall penetrations in existing homes emphasizes maintaining a continuous water-control layer around openings and penetrations.
If moisture damage exists, identify the source before continuing the installation.
2. Remove or Loosen Enough Siding to Work Properly
When working with existing siding, loosen the necessary courses without damaging their locking edges or fasteners.
Avoid forcing a flashing membrane into a narrow space where you cannot see how it connects to the barrier behind the siding. You may need to temporarily remove additional siding so the flashing can be positioned correctly.
The goal is not simply to slide flashing under the panel. You need enough access to integrate it with the drainage plane.
3. Choose the Correct Flashing for the Location
There is no single piece of flashing that works everywhere.
Common options include:
- Z-flashing above horizontal trim
- Step flashing where a roof meets a wall
- Base flashing at the bottom of a wall
- Pan or joint flashing behind certain siding joints
- Flexible flashing membrane around penetrations
- Formed metal flashing around transitions
Make sure the flashing material is compatible with surrounding materials. Certain metals, treated lumber, sealants, and membranes can react with one another.
4. Integrate the Flashing With the Water Barrier
This is the step that matters most when learning how to install flashing under siding.
Think like water. Water moving down the wall should always land on the next layer that carries it outward.
Generally, the upper section of flashing is integrated behind or beneath the water-resistive barrier above it, while the lower portion directs moisture toward the exterior. The U.S. Department of Energy’s building science guidance also recommends overlapping the drainage layer with flashing around openings, penetrations, and wall transitions.
Do not reverse the lap. A reversed flashing lap can funnel water behind the barrier instead of away from the building.
5. Maintain Drainage Gaps
More caulk is not always better.
Some flashing details intentionally include openings that allow trapped moisture to drain. Filling every visible gap with sealant can block that drainage.
Follow the siding manufacturer’s required clearances around flashing, roofs, trim, concrete surfaces, and other building components. These measurements vary by siding system, so avoid using one universal clearance for every installation.
6. Secure the Siding Without Blocking the Flashing
Reinstall the siding while maintaining its required expansion, fastening, and drainage clearances.
Fasteners should penetrate approved framing or sheathing locations without unnecessarily puncturing critical flashing areas. Do not flatten formed flashing that needs a slope or drip edge to move water away from the wall.
Once the siding is back in place, confirm that the flashing still drains outward.
Why Flashing Problems Often Stay Hidden
A flashing mistake may not produce an immediate indoor leak.
Small amounts of water can repeatedly enter behind siding during heavy rain. If that moisture cannot drain, the sheathing may remain damp for long periods. Over time, the result can include swelling, decay, staining, loose siding, damaged insulation, or deterioration around windows and wall penetrations.
The International Residential Code provisions for exterior wall coverings illustrate the same basic building-science principle: exterior wall assemblies need both a water-resistive barrier and a way for penetrating water to drain toward the exterior.
This is why good installation focuses on the entire wall assembly rather than treating siding as a completely waterproof surface.
What About Flashing at the Bottom of the Wall?
Base flashing has an important job because water moving through the drainage plane eventually needs somewhere to exit.
A properly designed bottom detail directs that water away from the wall instead of allowing it to reach the foundation or remain against the sheathing. The Building America guidance for flashing at the bottom of exterior walls also describes how base flashing and the water-resistive barrier work together to create a drainable assembly.
Pay particular attention where siding approaches decks, concrete surfaces, patios, rooflines, and grade. These transitions commonly create moisture problems when installation clearances are ignored.
Can You Install Flashing Under Existing Siding?
Yes, in some situations, but sufficient siding usually needs to be loosened or removed so the flashing can be connected correctly to the drainage system.
Simply cutting a piece of metal and forcing it behind existing siding may hide the visible joint without fixing the actual water path. If the existing barrier is deteriorated, incorrectly lapped, or missing around the affected area, additional removal may be necessary.
If you find wet sheathing, widespread deterioration, repeated leaks, or questionable flashing around several openings, the project has moved beyond a simple patch.
Protecting Washington Homes With a Complete Siding System
For Pacific Northwest homes, moisture protection is especially important. Frequent rain and wind-driven water can expose weak details around siding joints, trim, windows, roof intersections, and penetrations.
Builders Service Company approaches siding as part of the home’s complete exterior protection system. Our siding work includes removal and replacement when necessary, careful installation, and solutions designed for Washington weather. Our Evergreen Shield Siding System was developed with long-term exterior performance in mind, giving homeowners another option when upgrading an aging siding system.
Professional evaluation is particularly worthwhile when flashing problems involve multiple wall sections, damaged sheathing, older siding, window openings, or roof-to-wall connections. Those conditions often require more than applying flashing to one exposed joint.
Why Homeowners Choose Builders Service Company
- Serving Washington homeowners since 1974
- More than 50 years of exterior remodeling experience
- Licensed and insured exterior contractor
- Better Business Bureau A+ accredited business
- Two-time Golden Hammer Contractor Award recipient
- Experienced in siding, roofing, windows, and other connected exterior systems
Get Help Protecting Your Home’s Exterior
Incorrect flashing can remain hidden behind siding until moisture damage becomes much more expensive to repair. If you are planning siding replacement or have concerns about moisture behind your exterior walls, Builders Service Company can evaluate the complete system rather than treating only the visible symptom.
We serve homeowners throughout Seattle, Tacoma, Olympia, Bellevue, Everett, Puyallup, Federal Way, Kent, and communities across Western Washington. Get in touch to schedule a free in-home consultation and discuss the right siding solution for your home.
Frequently Asked Questions
Does flashing always go behind siding?
Flashing commonly sits behind siding, but its exact position depends on the wall assembly and the type of flashing being installed. It must connect correctly with the water-resistive barrier so water continues moving toward the exterior.
Can flashing be added without removing siding?
Sometimes a small section can be loosened, but proper installation often requires removing enough existing siding to access the barrier and sheathing behind it. Limited access can make correct flashing integration impossible.
Should you caulk between siding and flashing?
Not automatically. Some siding systems require drainage or clearance gaps that should remain open, so follow the siding and flashing manufacturer’s installation requirements instead of sealing every gap.
What happens if siding flashing is installed backward?
Water can be directed behind the water-resistive barrier and toward the sheathing. Even a good flashing material will fail if the layers overlap in the wrong direction.
Can flashing stop existing moisture damage?
Flashing can prevent future water entry when correctly installed, but damaged or wet materials should be identified and repaired before the wall is closed again.
How long should properly installed siding flashing last?
Quality flashing can remain effective for decades when compatible materials are used and the surrounding siding, fasteners, sealants, and drainage system remain in good condition.